In our current example we have a 4-level hierarchy. As we commented previously, because we are currently viewing the default hierarchy (i.e., the one defined in the historic data file) the status bar lists the hierarchy as 1-2-3-4.
Select Total>Cakes>Food-King on the Navigator. This displays the total cake sales for Food-King. The “children” (i.e., component series) of this group are the SKU-level cake sales to Food King.
What if we wanted to view or adjust total sales for a given SKU across customers? The current hierarchy is not set up to do this. To accomplish this, we need to reorganize our hierarchy so that the SKUs appear on level 3 of the hierarchy and the customers appear on level 4.
On the Operations tab, click the Reorder Hierarchy icon. Select SKU (currently fourth on the list) and click the Move Up button to move SKU to the third position on the attribute list.

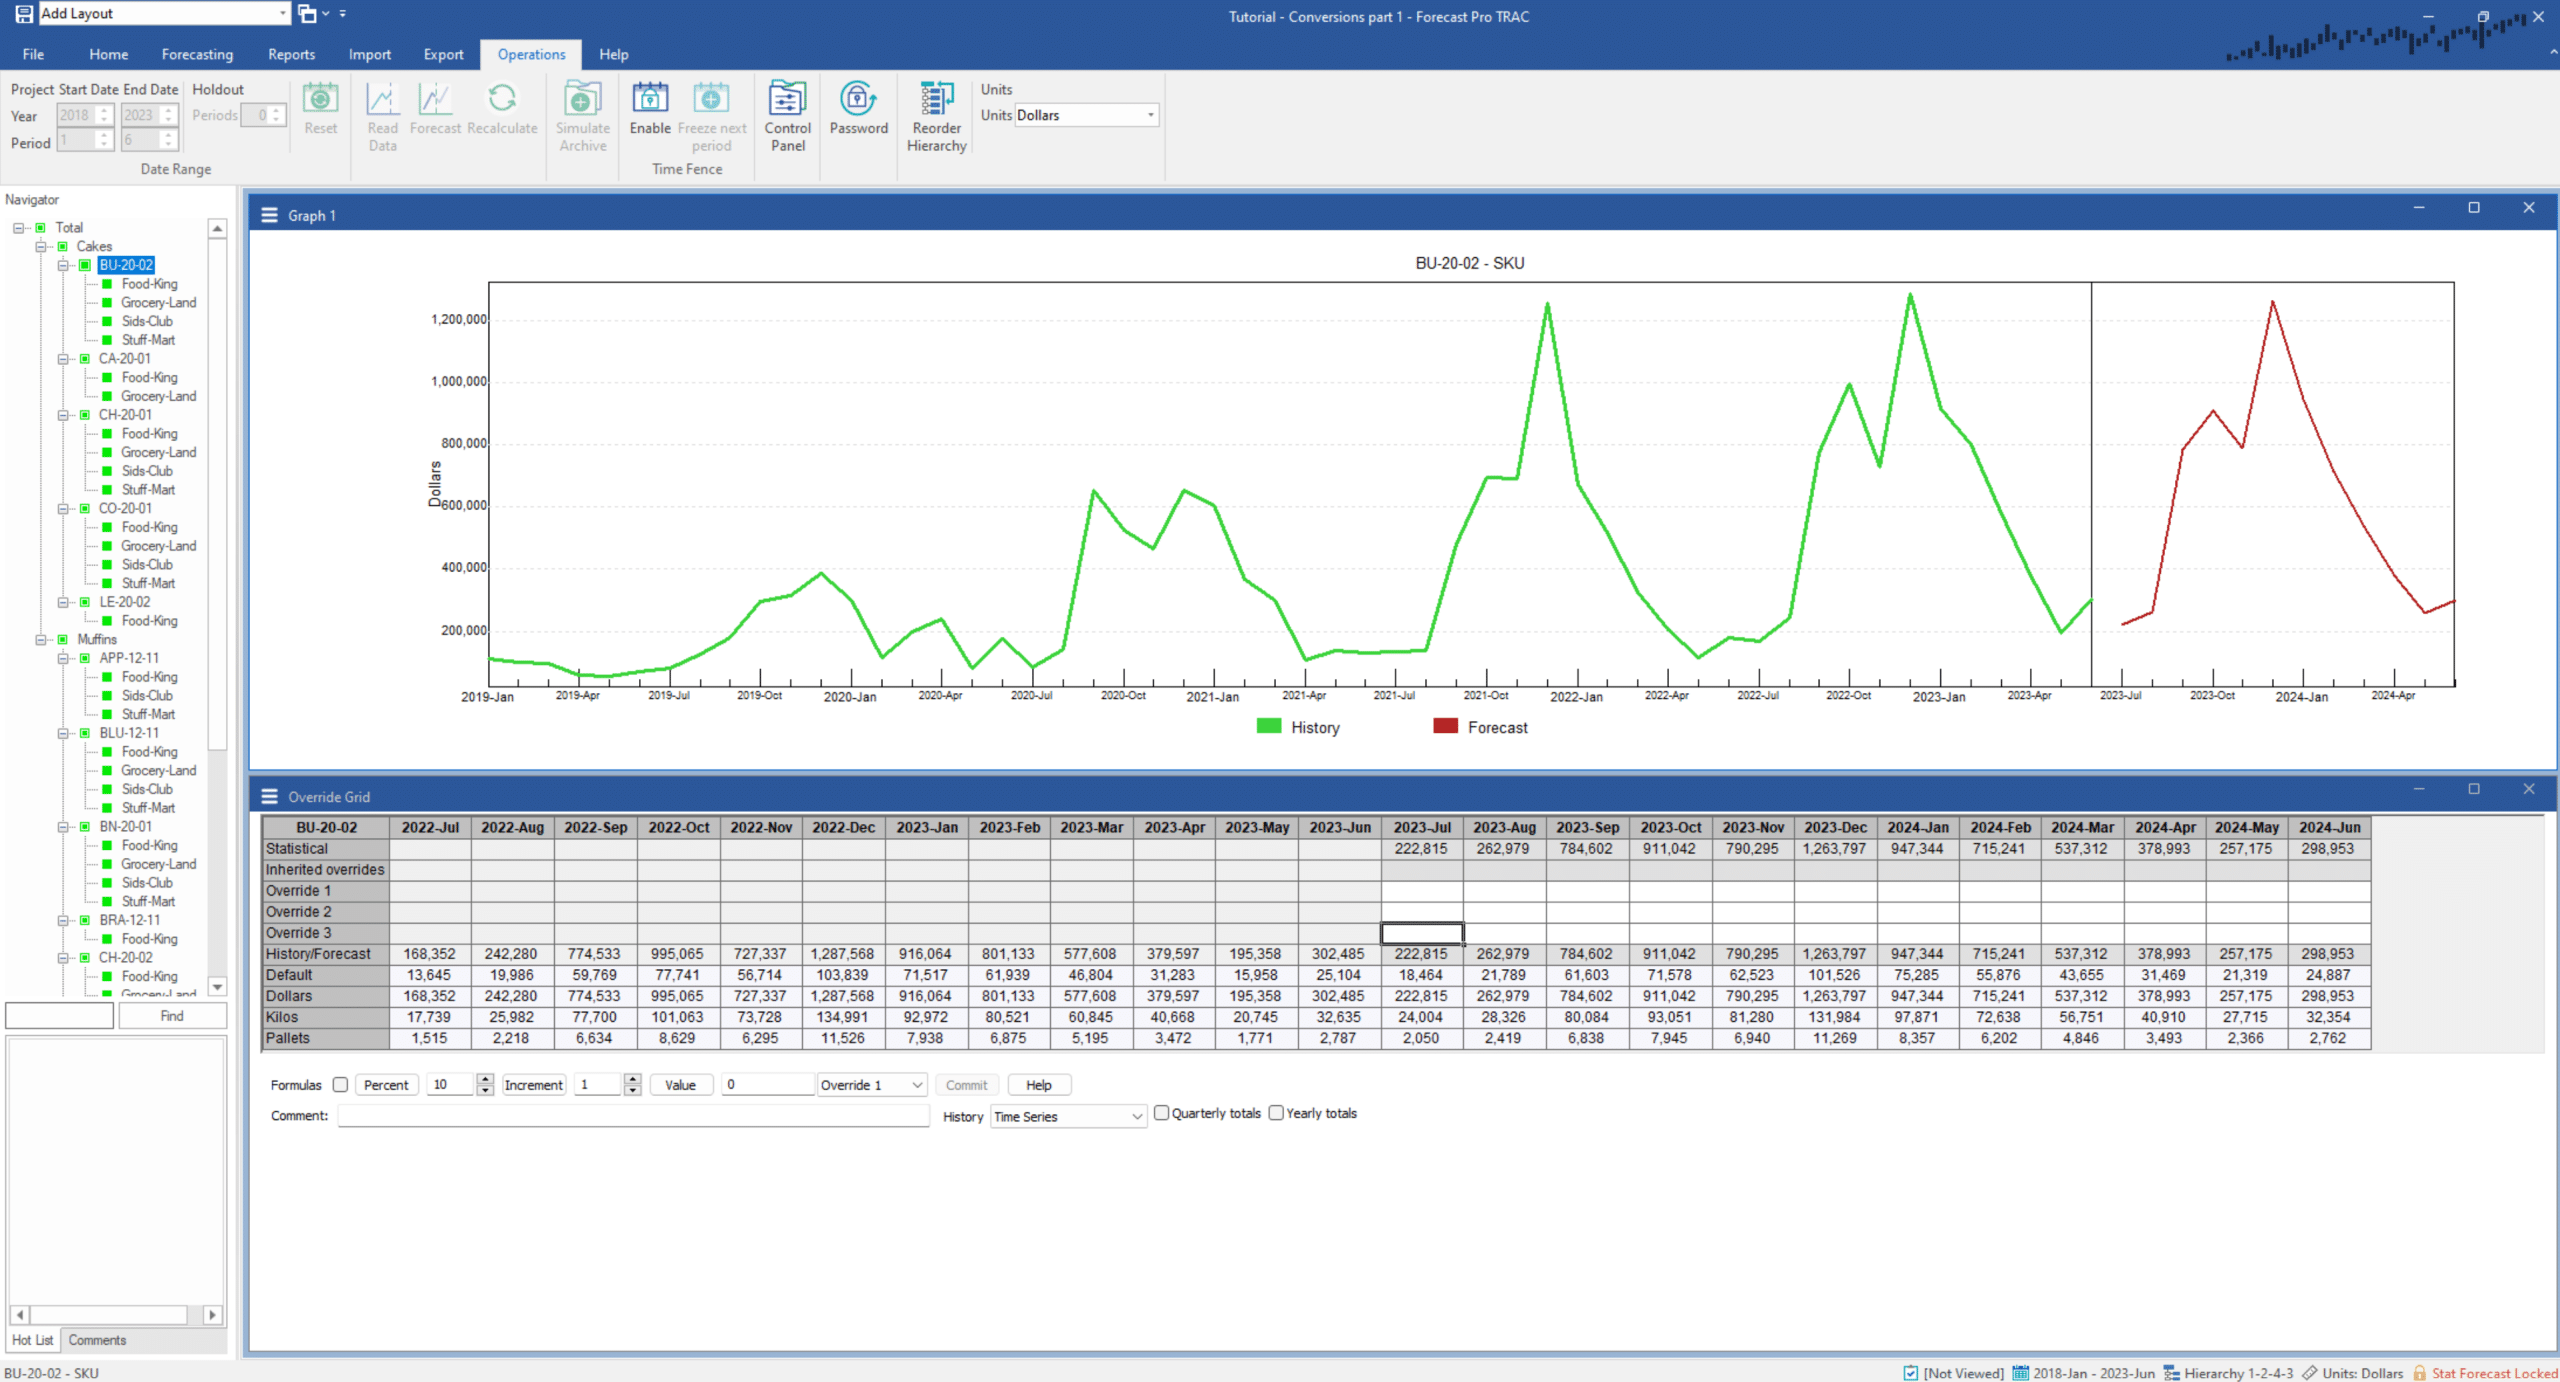
Fully expand the Navigator and select BU-20-02. Your display should look like the one below.

Notice that by moving SKU from fourth to third in the attribute list, we have created a new hierarchy that allows us to view and adjust total sales by SKU across customers. The status bar lists this new hierarchy as 1-2-4-3 to reflect the fact that we have moved the original level 4 attribute to the third level of the hierarchy.
Experiment with the hierarchy adjustment and conversion options until you are comfortable with their operation. Select the File tab and then close the project. When prompted, do not save the changes to the Tutorial –Conversions – part 1 project.

