Forecast Pro TRAC only
Time fences are used to “lock” forecast values for a specific number of periods so that they can’t be changed via user overrides or by the generation of new statistical forecasts as new data become available. Time fences can be useful in environments where after forecasts have been finalized and acted upon (i.e., production has been scheduled, orders have been placed, etc.), there is a window of time where making changes is not feasible.

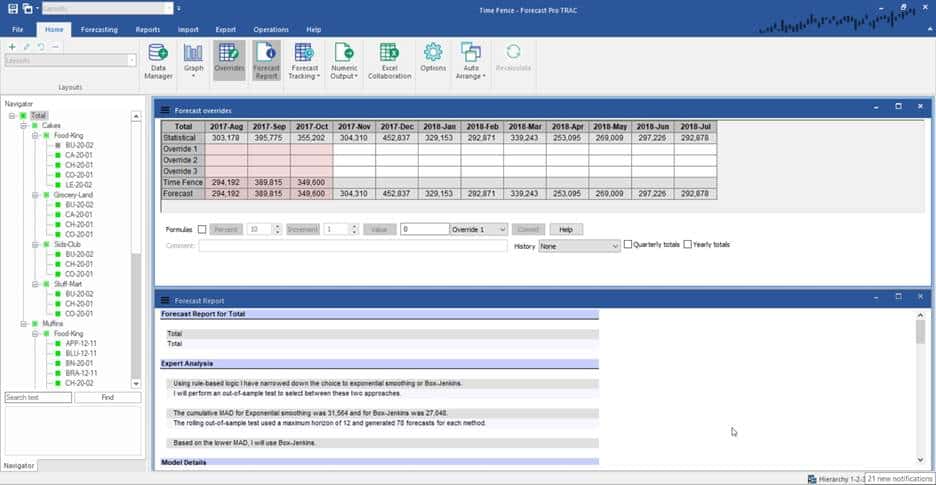
The screen above shows the Forecast overrides view for an item with a 3-month time fence. Notice the second to last row of the grid is labeled Time Fence. The values displayed in this row are the unchangeable fenced values and the same values appear in the final Forecast row.
Notice that the statistical forecast for August (303,178) does not equal the time fence value (294,192). This is because August’s time fenced value was established when last month’s forecasts were generated.
Let’s now consider what happens next month. We update our data with August’s sales, open last month’s project and generate new statistical forecasts. Our 3-month time fence will now cover August through October. August’s and September’s time fenced values will be retained from last month’s time fenced values and November’s time fenced value will equal last month’s final forecast for November.
Time Fence Settings and Options
Turning on the time fence: When you first create a project, the time fence will be turned off. You turn the time fence on by selecting clicking the Enable icon in the Time Fence group on the Operations tab. Once you turn a project’s time fence on, it cannot be turned off!

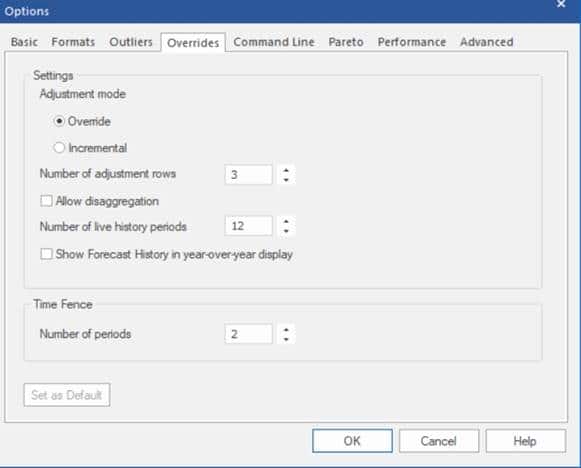
Setting the length of the time fence: The default length for the time fence can be specified on the Overrides tab of the Options dialog box (shown above).
You can override the global setting on an item-by-item basis using the custom modifier \TIMEFENCE=n where n is the number of periods you wish to use. Be aware that if you use the \TIMEFENCE modifier to create a time fence shorter than the global time fence, it will shorten the time fence for all associated parent groups of the item.
Freezing the next period: Clicking the Freeze Next Period icon in the Time Fence Group on the Operations tab will increase the length of all time fences in the current project by one period for the current forecast origin. If you subsequently update your data with the next observation and create a new forecast (thus changing the forecast origin) the time fence lengths will revert back to their pre-Freeze-Next-Period settings. This option provides a way of insuring that after the forecasts are finalized someone doesn’t inadvertently alter the frozen periods’ forecasts prior to the data being updated, new forecasts being generated and the frozen periods’ forecast becoming an officially fenced value.

