Forecast Pro allows you to import custom filter fields into your project via the Filters row on the Data Manager. This can be very useful when you wish to filter reports based on attributes that are not part of your forecasting hierarchy. In this exercise we will display custom Pareto codes that were defined as a custom filter.
Start Forecast Pro and open the project, Tutorial – Pareto.
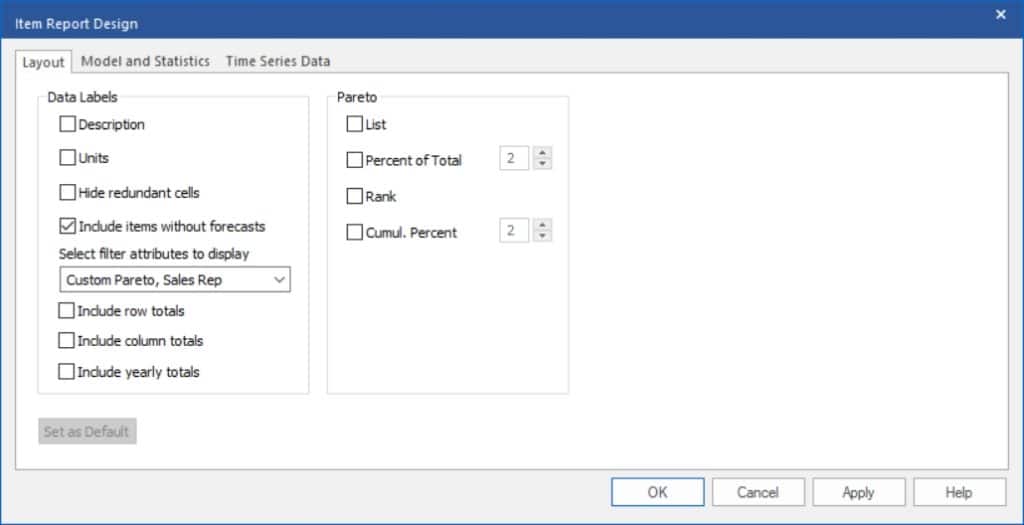
Right click on the Item Report view to display its context menu and select Item Report Settings.

Open the Select filter attributes to display drop-down. Notice that there are two custom filters available—Custom Pareto and Sales Rep. Click the checkboxes for both custom filters and click OK.
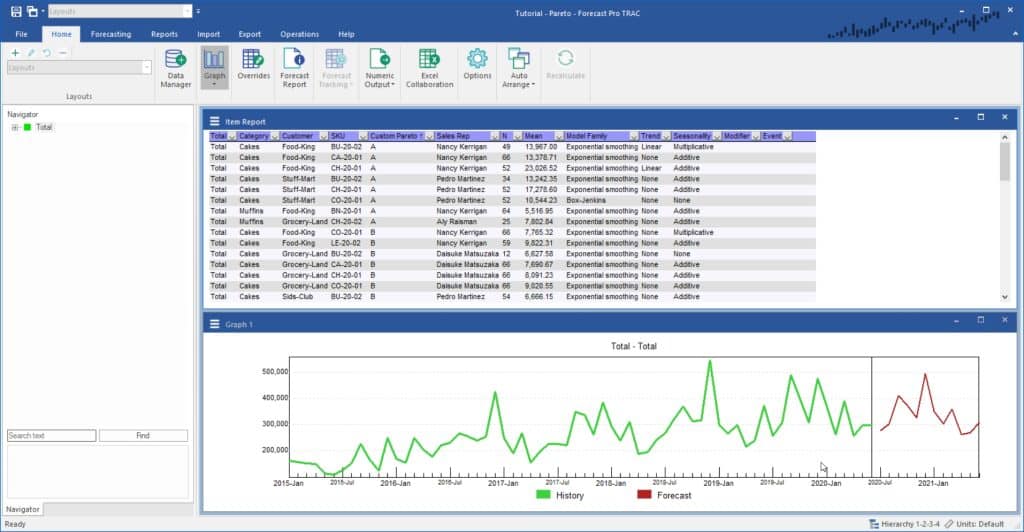
Notice that the Item report now includes the two filter fields.
Select Filters on the Item Report View’s hamburger menu (or select Filters from the context menu) to activate the filtering and sorting mode. Click on the filter drop-down for the column Custom Pareto, select Sort A to Z and click OK. Your screen should now look like the one below.

Scroll through the report. Notice that the custom filter defined codes for A, B, C, D and E rather than just ABC. Using a custom filter for your Pareto codes allows you to specify as many categories as you wish and assign membership in any fashion you desire.
Experiment with the filtering and sorting options until you are comfortable with their operation. When you are finished, exit the program without saving changes to the Tutorial – Pareto project.
This concludes the Pareto Analysis lesson.

