The custom component model is based on the components found in an exponential smoothing model, specifically, level, trend, seasonality and events. In a standard smoothing approach, final values of each component are estimated from the data and used to assemble the forecasts.
New products, however, often do not have enough data to generate reliable starting values. For example, if you have less than one year’s worth of historic data it is not possible to generate seasonal indexes directly from the historic data.
In a custom component model, you may either let Forecast Pro estimate the final value for a given component or customize the values to be used. In this section, we will explore how we can customize starting values for new products.
Start the program and click the New Project icon. From the Home tab, open the Data Manager and specify Auto Parts – Historic Data.xls on the Historic Data Row. Click the Read & Forecast button and then click Exit to exit the Data Manager. On the Home tab, close the Override view and open the Forecast Report view.
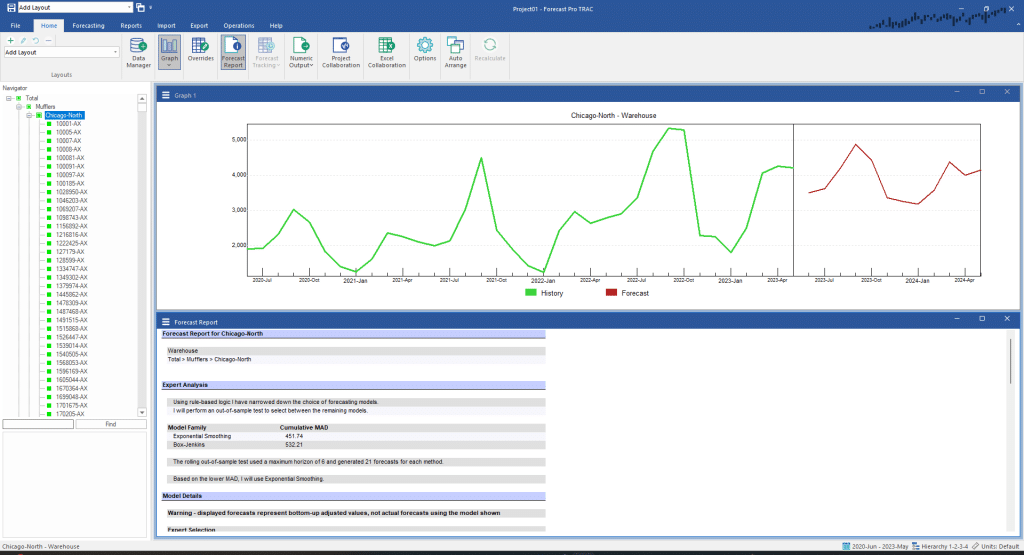
Let’s explore the data a bit. Double click on Total in the Navigator, then double click on Total>Mufflers, then double click on Total>Mufflers >Chicago-North. Your screen should now look like the one above.
Note that there are 4 hierarchy levels—Total, Category, Warehouse and SKU. Note also that this data set has far more items than the data sets we have explored in earlier lessons. It includes over 2,000 SKUs.
Select Total>Mufflers>Chicago-North>100081-AX on the Navigator. It is the fifth end item down.
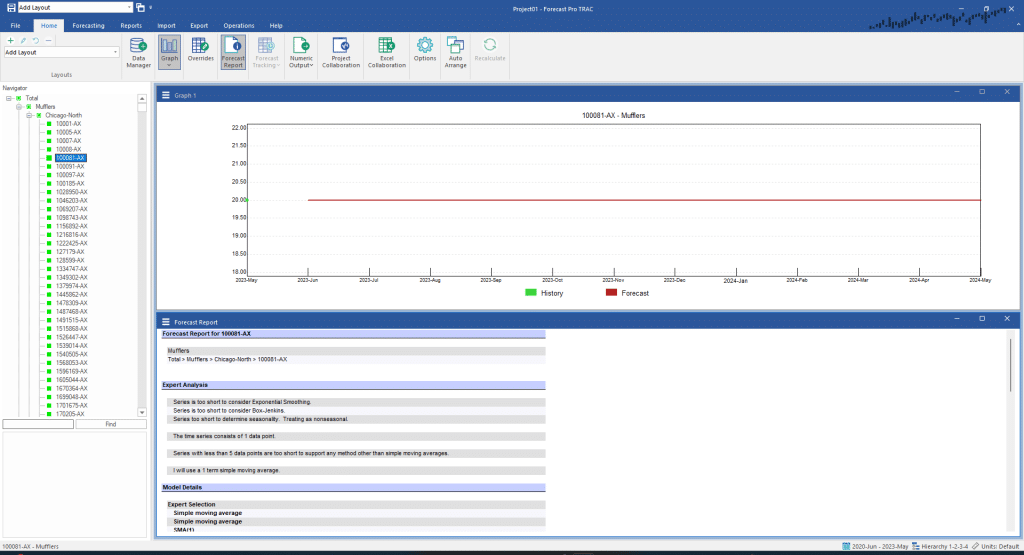
This data series has only one data point. In the Forecast Report, you can see that Forecast Pro is using a simple moving average with one period. The forecast is equal to this single historic data point for all forecast periods.
Now select the group level Total>Mufflers>Chicago-North on the Navigator.
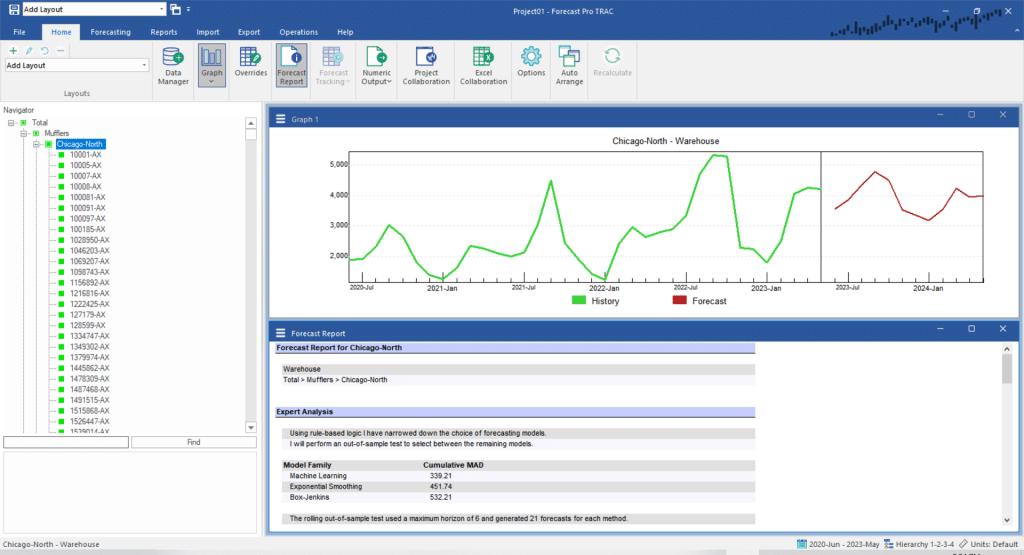
Note that the data are clearly seasonal, and it is logical to assume that all of the muffler SKUs in the Chicago-North warehouse would have similar seasonality.
Re-select Total>Mufflers>Chicago-North>100081-AX on the Navigator. Go to the Forecasting tab and click the Custom Component icon in the New Products group to open the Custom Component dialog box. Click Apply.
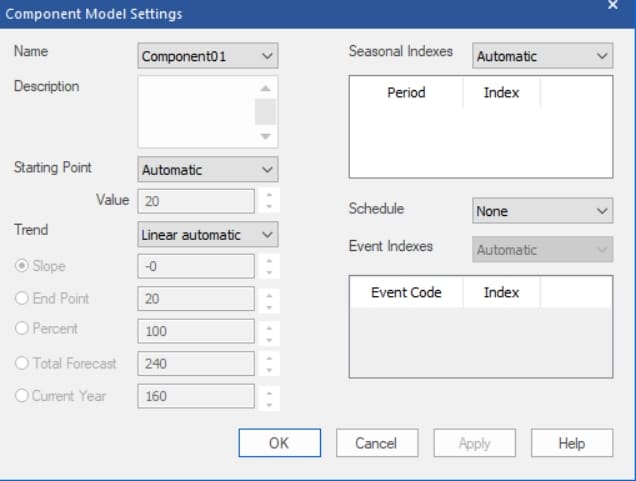
The default custom component model generates the same forecast as the simple moving average model. The starting value is equal to the one historic data point (20) and there is no trend or seasonality, because there is not enough data to estimate either component.
Open the Seasonal Indexes drop-down. Note that you have the option to choose Custom and enter multiplicative seasonal indexes of your choice or you may use a helper variable. We will use a helper variable, but first we need to create that helper variable. For our helper variable, it makes sense to use the seasonal component from the group Total>Mufflers>Chicago-North.
Close the Component Model Setting dialog and select Total>Mufflers>Chicago-North on the Navigator. On the Forecasting tab, select the Create Helper icon in the Tools group on the far right.
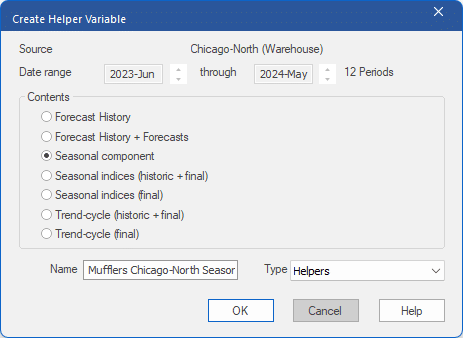
On the top of the box, you may specify which historic data you want to use to create your helper variable. The default is to use all available data. Keep the default setting.
In the Contents section, you can specify the type of helper variable you want to create. The different helper types are documented here. Select Seasonal component, change the name from the default to “Mufflers Chicago-North Seasonal Component” and leave the type to the default selection of Helpers. Click OK to create the helper and exit the dialog box.
Scroll to the bottom of the Navigator and expand the Helpers by clicking the + sign to the left of Helpers. Select Mufflers Chicago-North Seasonal Component.
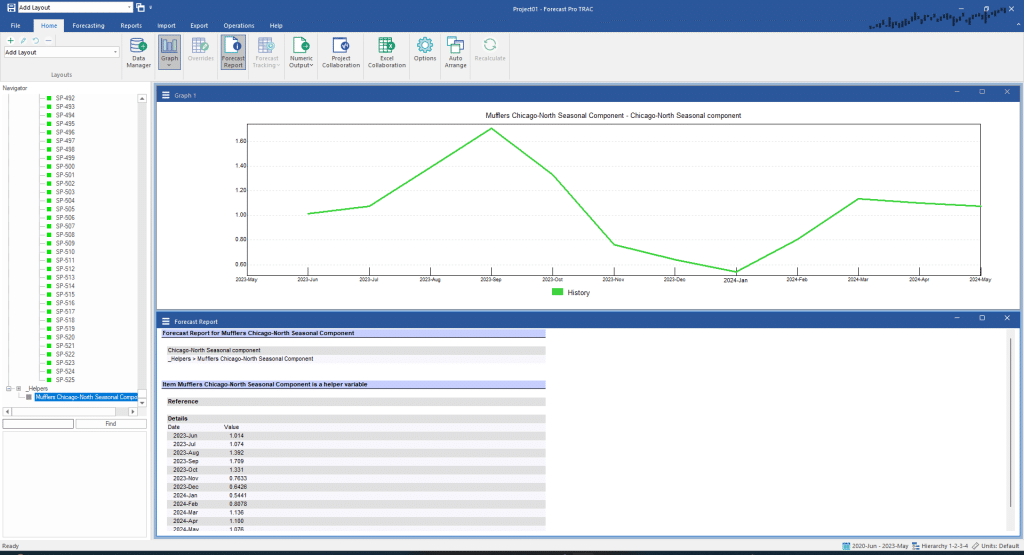
Note that our helper variable consists of a seasonal index for each forecast period, with sales peaking in September with a seasonal index a little more 1.6.
Re-select Total>Mufflers>Chicago-North>10081-AX on the Navigator and click the Custom Component icon on the Forecasting tab to open the Component Model Settings dialog.
In the next section we will use the custom component model we are now building to forecast additional SKUs. To facilitate this, let’s give our model specification a specific name. Open the Name drop-down and select Save As. Save the model as “Mufflers-Chicago-North” and click OK to close the Save As dialog.
In the Component Model Settings dialog, select <Helpers…> in the Seasonal Indexes drop-down. Select Mufflers Chicago-North Seasonal Component.
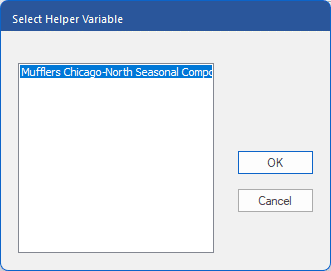
Click OK to close the Select Helper Variable dialog and then click OK on the Component Model Settings dialog to build the model.
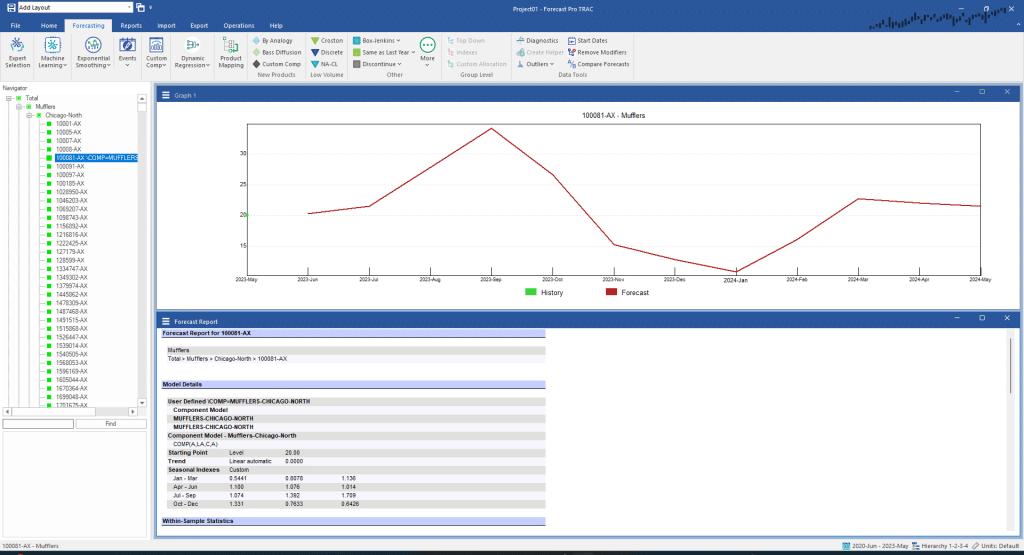
The forecast now incorporates the seasonality of overall muffler auto parts in Chicago-North.
Proceed to the next section—do not exit Forecast Pro.

