In this section we will explore using a custom allocation to construct the forecasts. A custom allocation approach allows you to dictate how a group-level forecast is allocated to its component series. This is appropriate when the breakdown between the two levels is known and consistent.
In this example, we will forecast demand for running shoes and use a custom allocation to determine how the statistically generated forecast for each specific shoe should be broken out to the different sizes.
Start Forecast Pro and select the New Project icon. From the Home tab, open the Data Manager.
Click the Add drop-down on the Historic Data row, select Excel and select Running Shoes – Historic Data.xlsx to add it to the Historic Data row.
Click the Add drop-down on the Definitions row, select Excel and select Running Shoes – Custom Allocation.xlsx to add it to the Definitions row.
Click the Read & Forecast button to read in the historic demand data and generate the statistical forecasts. Notice that since the on Read option is selected for the Definitions row, this action read in the definitions data as well.
Click the Exit button to exit the Data Manager.
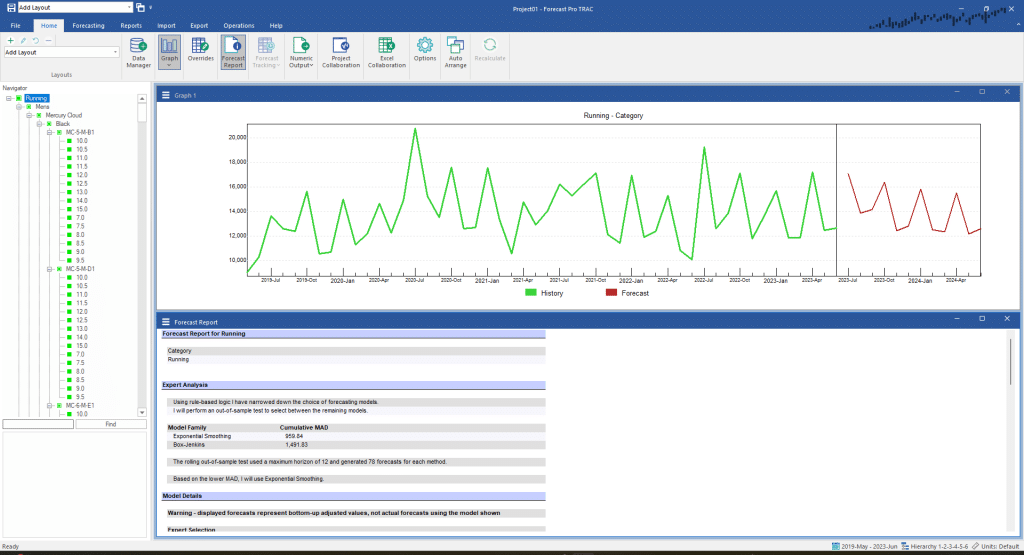
Close the Override view, open the Forecast Report and fully expand the Navigator. Your screen should now look like the one shown below.

Notice that the data are organized into a 6-level hierarchy including category, gender, style, color, style ID and size.

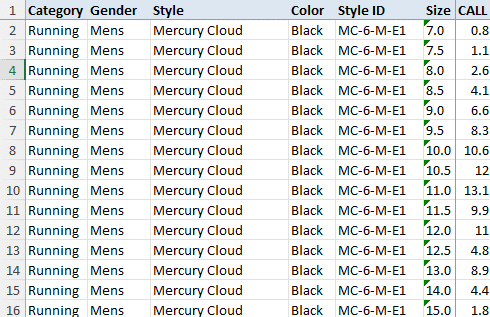
The CALL column in the file Running Shoes – Custom Allocation.xlsx contains the size breakdowns to use for the allocations. If you examine the file you will notice that all of the Men’s shoes use consistent size proportions to define the allocation between the Style ID and Size levels. The Women’s shoes also use (different) consistent proportions.
Since the size of runners’ feet is not changing rapidly in time, using a size chart or a historic frequency analysis chart to perform the allocation rather than explicitly forecasting each shoe-by-size combination based on its historic demand is likely to yield a more accurate forecast.
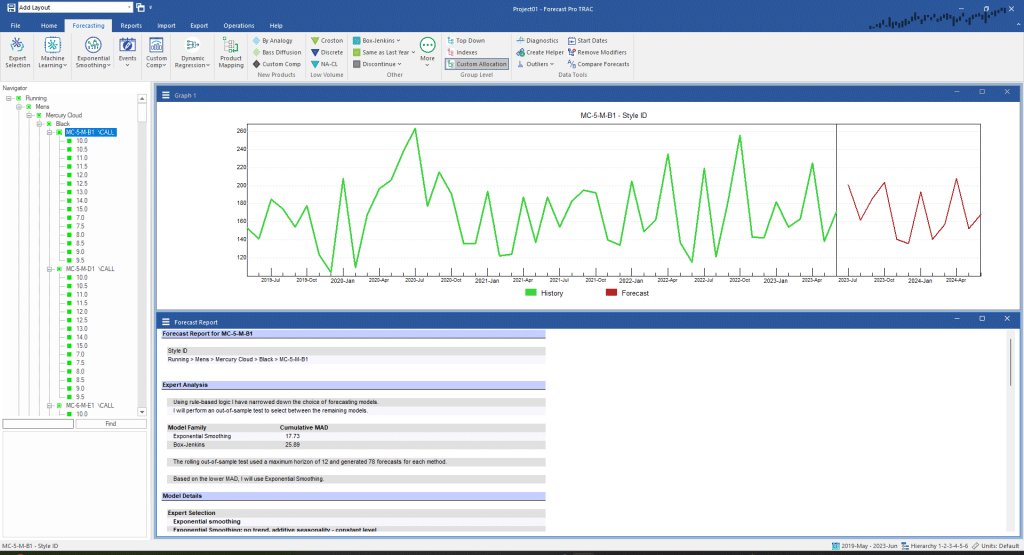
Select Running>Mens>Mercury Cloud>Black>MC-5-M-B1 on the Navigator. Select the Forecasting tab and click the Custom Allocation icon in the Group level group. Notice that the \CALL modifier now appears on Running>Mens>Mercury Cloud>Black> MC-5-M-B1. This instructs Forecast Pro to use a custom allocation to break down the Running>Mens>Mercury Cloud>Black> MC-5-M-B1 group forecast to the various sizes.
In our example we wish to use the custom allocation for all size breakdowns. Right click Running>Mens>Mercury Cloud>Black> MC-5-M-B1 on the Navigator to invoke the context menu. Select Apply Modifier(s) to>This Level to place the \CALL modifier on all Style ID’s. Your screen should now match the one below.

After you have examined the output, exit Forecast Pro.

