Start the program, select New Project and, on the Home tab, click the Data Manager icon to open the Data Manager. Click the Add drop-down on the Historic Data row, select Excel and select Giveaway.xls to add it to the Historic Data row.
Click the Read & Forecast button to read in the historic demand data and generate the statistical forecasts.
Click the Exit button to exit the Data Manager.
Close the Override view and open the Forecast Report view by clicking the Forecast Report icon on the Home tab. Your display should now match the one shown below.
SKU087 represents monthly sales of a plastic storage container that is sold along with other storage products via in-home sales parties. The most notable feature in the data is the large peak in January of 2023.
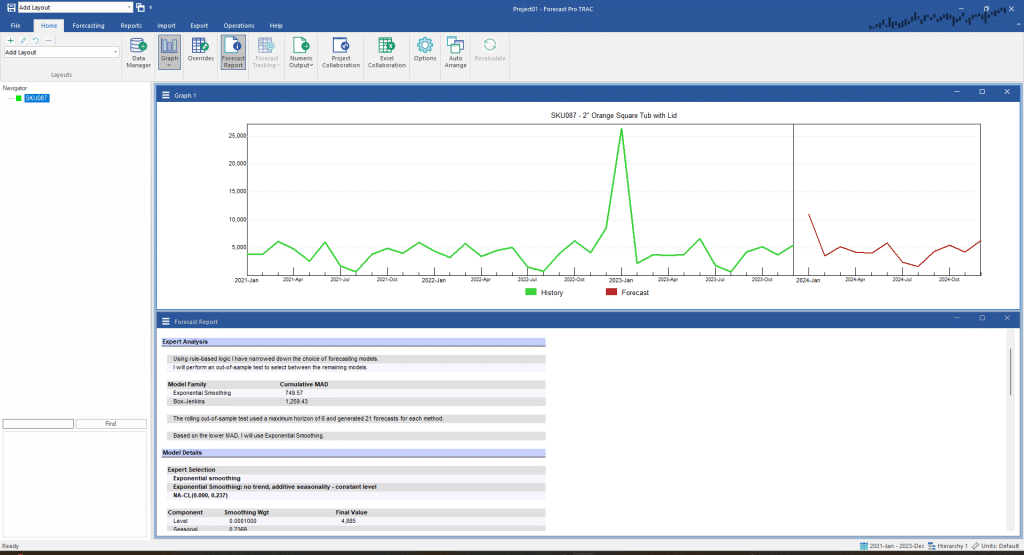
One of the marketing strategies that this firm uses is to provide everyone who attends an in-home party with a free gift. In January of 2023, SKU087 was the free gift. Thus, the volume associated with this period represents not only sales of the SKU but also the number provided free of charge.
By default, Forecast Pro modeled SKU087 using expert selection. Include the fitted values on the graph. (This is accomplished by toggling on Fitted on the graph’s context menu).
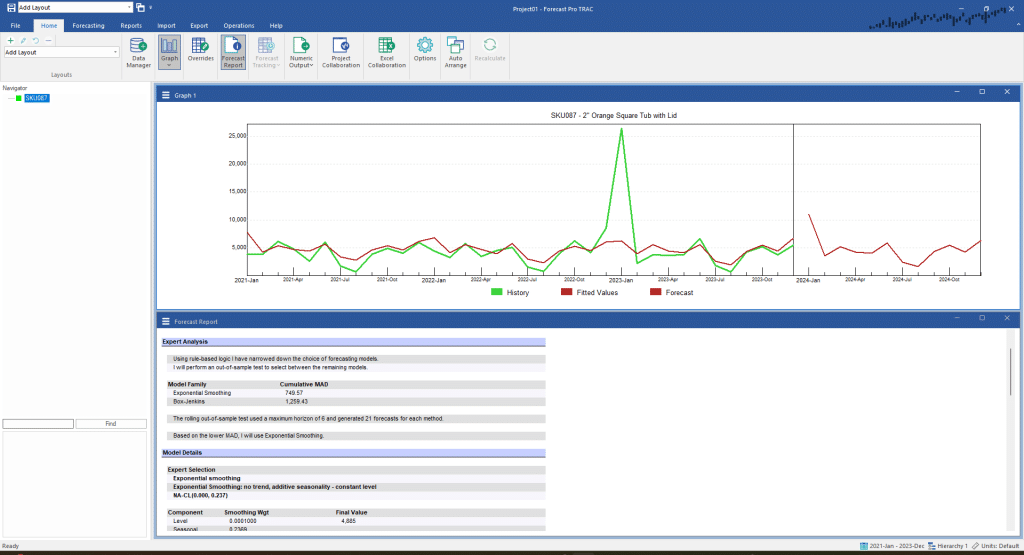
Notice that the model completely misses the January 2023 peak. This is because we are fitting this point based solely on the history and a demand peak of this magnitude is unprecedented. Notice also that the forecast for January 2022 is substantially higher than the January peaks in 2023 and 2022. This is because the January 2023 peak has a substantial impact on the January 2022 forecast. Since we know that the January 2023 peak is due to a promotion, this is not an appropriate forecast.
We will now build an event model for SKU087. Select the Forecasting tab and click the Events icon to open the Manage Events dialog box, which is currently empty. The first step in building event models is to define the event types you’d like to use.
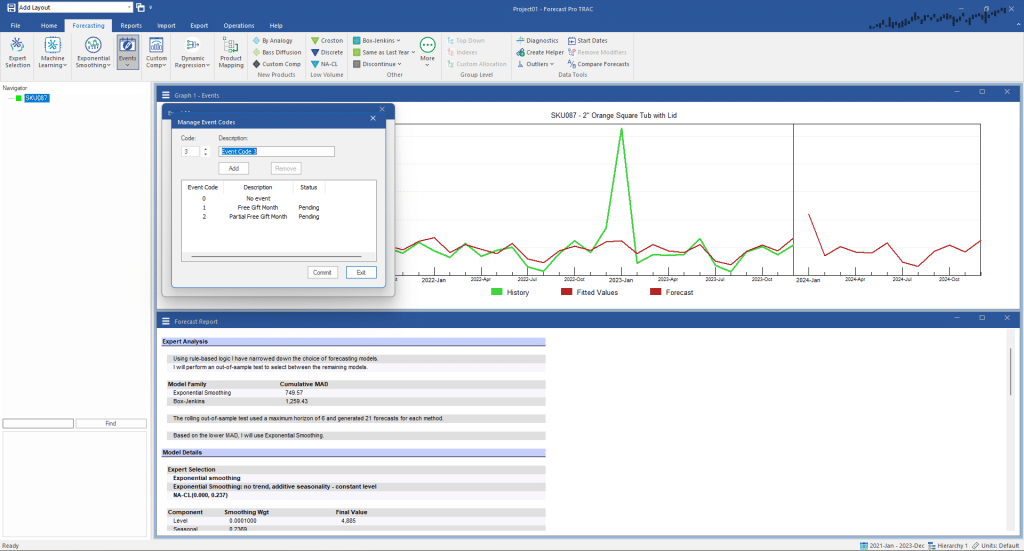
Click the Edit button to open the Manage Event Codes dialog box. The event code 0 is always used to indicate no event occurred. Therefore, it is predefined and No Event already appears in the bottom portion of the dialog box as a defined event type. Edit the description displayed for Event Code 1 to read Free gift month and click the Add button. Notice that the event type is added to the list with a status of “Pending” and that the dialog box is now ready for you to define Event Code 2. Edit the description displayed for Event Code 2 to read Partial free gift month and click the Add button. Your screen should now match the one shown above.
Click Commit to accept the new event codes and then Exit to return to the Manage Event dialog box. We are now ready to specify where the events occurred.
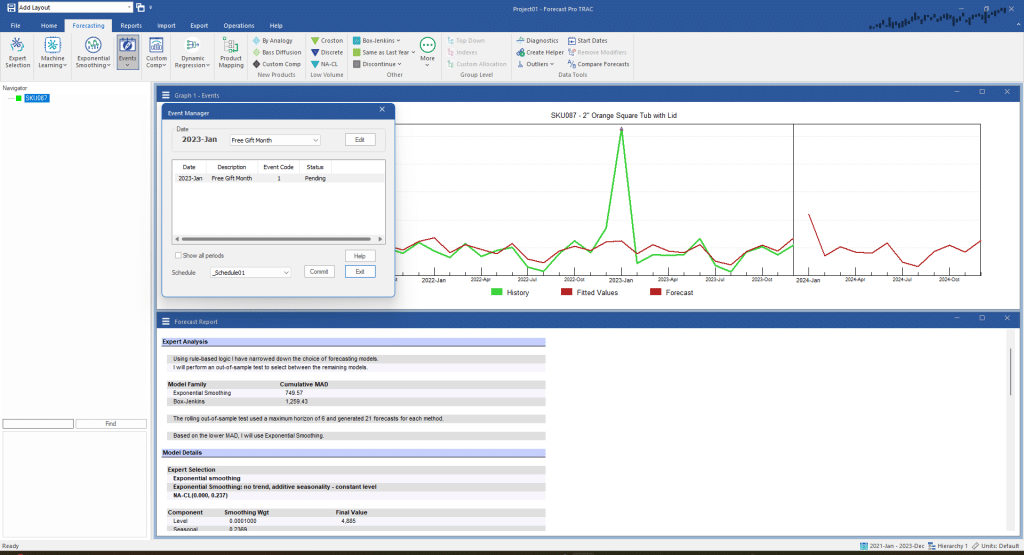
Click on January 2023 on the graph. Notice that the Manage Events dialog box displays the selected date and that a marker also appears on the graph to indicate that the period has been selected. Use the drop-down control to assign the Free gift month event to the selection. Notice that the assignment now appears in the lower section with a status of “Pending.” Click the Commit button to accept the assignment and build the event model.
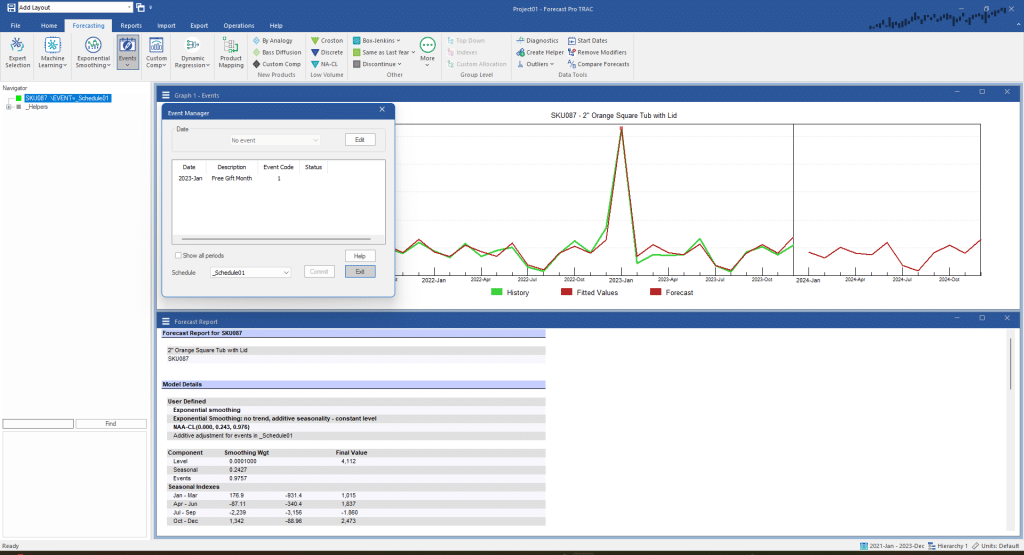
Notice the dramatic improvement in the fit and forecast. If you look closely at the graph, you might notice that the historic value for December 2022 is the second largest in the data set. This is due to the fact that SKU087 was the free gift for part of December 2022.
Click December 2022 on the graph and use the drop-down to assign the period to the Partial free gift month event code. Click the Commit button to update the model.
This was a very simple example, where we only had two promoted periods during the history. Because the periods were promoted differently (one was a partially promoted month and the other was a fully promoted month) we used two event codes to capture the responses. In our next example we will build an event model for data with a recurring promotion.
Examine the model output and experiment with the event manager until you are comfortable with its operation. When you are finished, exit the program.

