Start Forecast Pro and open the project, Tutorial – Customizing Events. In this exercise we will model weekly beer sales for a brand of beer in various package configurations.
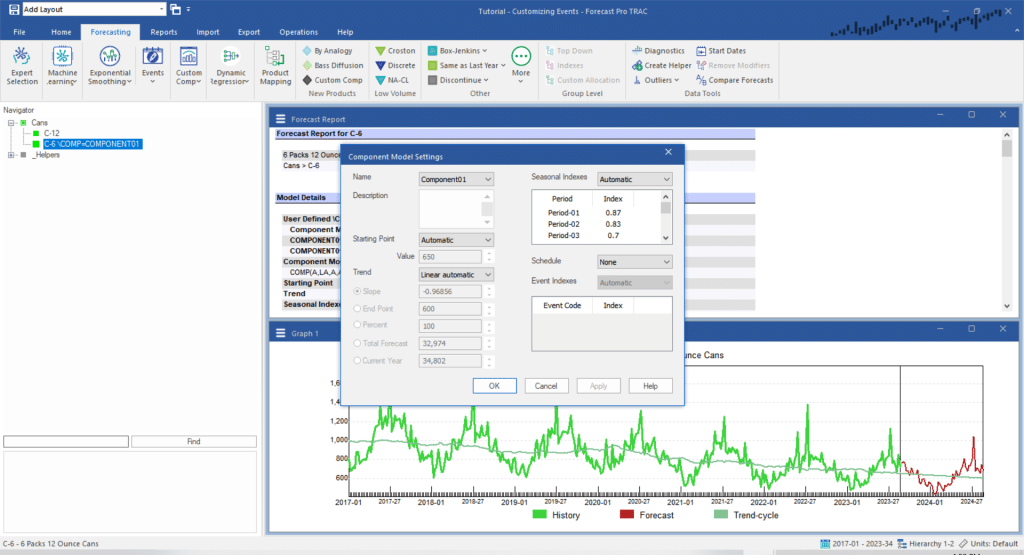
Close the Override view and click the Forecast Report icon on the Home tab to open the Forecast Report view. Select Cans>C-6 on the Navigator, select the Forecasting tab and click the Custom Component icon to invoke the Component Model Settings dialog box. Click the Apply button to build the initial model. Your screen should now match the one below.

Notice that the initial component model uses automatic starting point, trend and seasonal indexes. Notice also that since there is not an event schedule specified there are no event codes listed.
In the event model example in the Building Event Models tutorial we illustrated that the forecasts for this data could be improved using an event model to capture the timing of the summer holidays. In this lesson we will use event indexes in the component model to not only capture the impact of the summer holidays, but also to capture the expected impact of City Fest a new summer festival that is scheduled for week 41 in 2023.
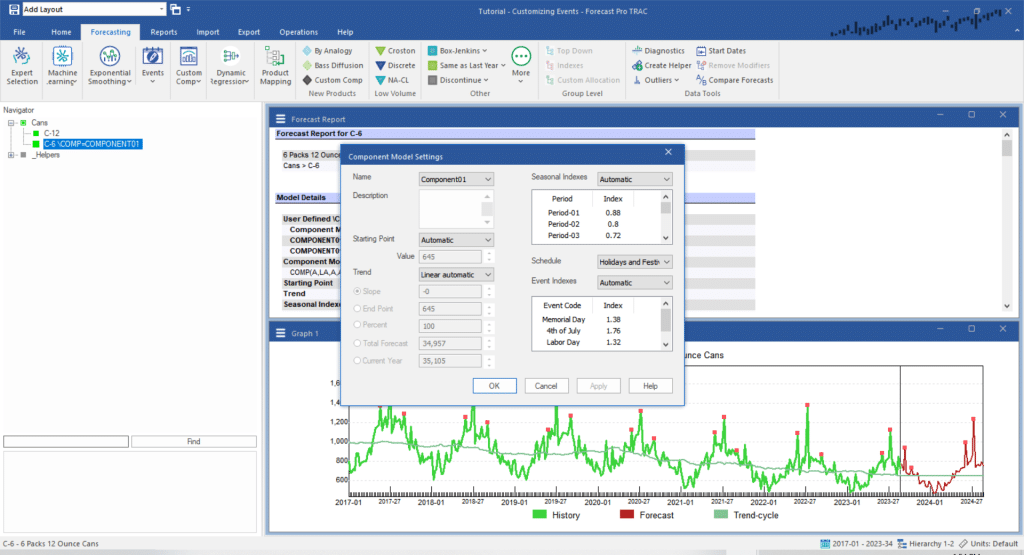
Open the Schedule drop-down menu, select Holidays and Festivals and click Apply.

When you specify an event schedule the component model will rebuild all automatically generated components to reflect the events. In our example, the starting point, trend and seasonal indexes are recalculated, and the event indexes are added to the model.
The Event Indexes mode is currently set to Automatic. Therefore, the program has estimated the event indexes from the historic data. Because City Fest has never occurred historically, its index is set to 1.
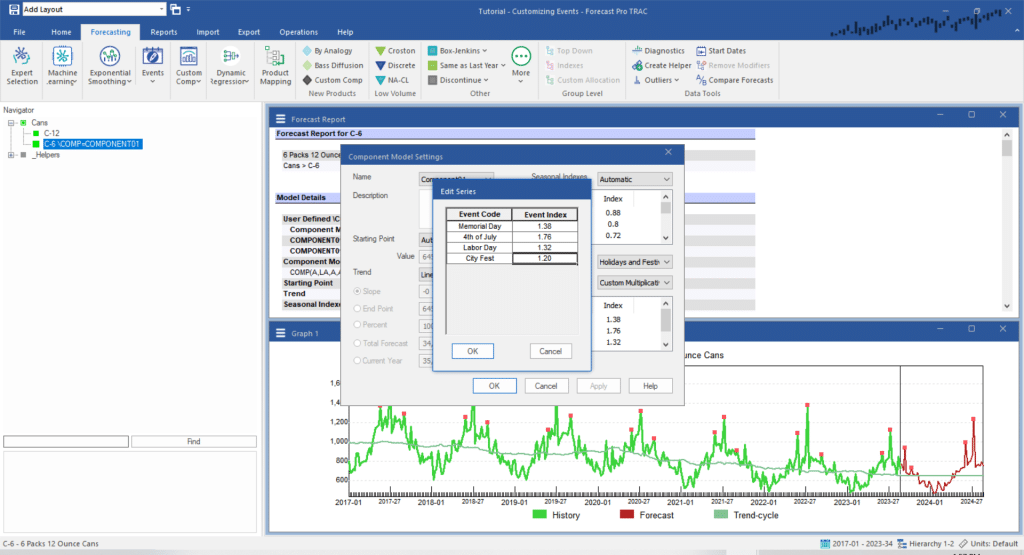
Let’s say that our market research leads us to believe that the City Fest event will raise beer sales by 20%. Therefore, we would like to set the City Fest Index to 1.2 rather than 1.0. To accomplish this, we will use a custom event approach rather than an automatic one.

Open the Event Indexes drop-down and select Custom Multiplicative. A dialog box appears allowing you to input custom indexes. Change the City Fest index from 1.00 to 1.20 and leave the other indexes at their current values. Click OK to exit the Edit Series dialog box and click Apply to accept the new model. Notice that the forecast for week 41 in 2023 has increased due to the custom City Fest index.
Experiment with the Component Model Settings box until you are comfortable with its operation and then exit Forecast Pro.

